PRINCIPLES
To create great smoked meats you need three things:
- You need to be able to produce clean smoke while cooking.
- You need to be able to control the cooking temperature within a reasonable range.
- You need to be able to pull the finished product at the correct cooked temperature.
Producing clean smoke:
Clean smoke or “thin blue smoke” refers to smoke that contains a minimum of creosote and wood solids (tar and soot). These chemicals can impart a bitter taste to the meat and may be bad for your health. You need to make the smoke wood smolder and not burn. If your smoker gives off billowing white smoke, your wood is burning, not smoldering. One way to accomplish this is to create a high heat, low oxygen environment for your smoke wood. This can be accomplished by using a sealed wood chamber with small holes to minimize airflow.
There are three things that many smokers lack that make it hard to control the cooking temperature:
- They are poorly insulated. Cool outside air means you have to apply more heat to the cooking chamber which causes uneven cooking and a dries out the product. “Low and slow” is impossible if high heat is required to compensate for the weather.
- They lack efficient dampers or temperature controls and require constant attention.
- The same heat source is used for cooking, creating smoke, and creating moisture. If your cooking temperature needs to be 225 degrees Fahrenheit and you also need to simmer water at 195 degrees Fahrenheit and create smoke at over 500 degrees Fahrenheit you really need 3 different heat sources.
INSPIRATION
Google “commercial restaurant smoker”, and you will see a lot of units that look like electric ovens and very few that look like they were made from scavenged propane tanks.
My father built a smoker out of a double wall oven. We made a lot of great food in his smoker oven. He used it for years, handed it down to me, and I handed it down to my brother. It was a great design but it had a few drawbacks:
- He wired it for 110V which made it hard for the oven to reach 225 degrees Fahrenheit when it was loaded with cold meat.
- He used an open type wood box which created sooty smoke.
- The water pan wasn’t near a heat source and probably only produced moisture toward the end of the cooking cycle.
- The oven used two elements in the same chamber; one small 700 watt element to burn the wood and a larger, thermostatically controlled oven element to cook the food. Toward the end of the cook, the 700 watt element caused the oven to overheat.
- The oven was only 18″ wide inside which made it tight for large briskets or multiple pans of pork butt.
My Quest
I set out to build a new electric smoker oven which eliminated the issues I had with other smokers. My design criterion was:
- A well insulated electric smoker.
- Separate heating elements for the smoke, the water, and the cooking chamber.
- The heating for the smoke and water should not significantly increase the cooking temperature of the cooking chamber.
- Something that could be used outdoors in a light rain or snow.
- Something I could roll in and out of my garage.
The Build
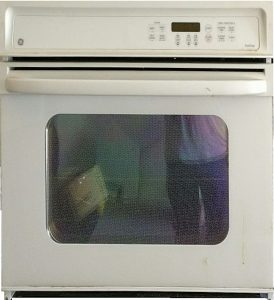
I got a 27″ G.E. electric wall oven. It measured roughly 27″ wide by 24″ deep on the outside. The inside racks are approximately 24″ wide.
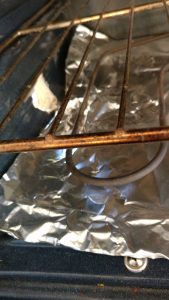
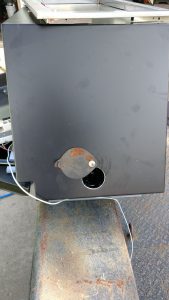
I used a 2″ hole saw to make a smoke and water vapor opening in the center of the left side of the oven (under the lowest rack).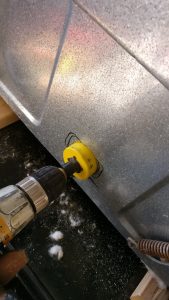
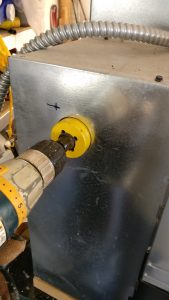
 I used the same hole saw to cut an exhaust port into the upper right back of the oven.

I filled these holes with 1.5″ conduit fittings and used J.B. Weld to hold them in place.
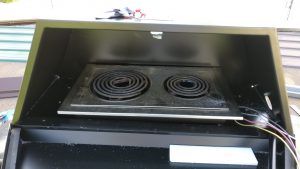
I also found an old Jenn-Air Downdraft electric cooktop. It was great for this application because of its modular design and the separate face-plate for the burner knobs.
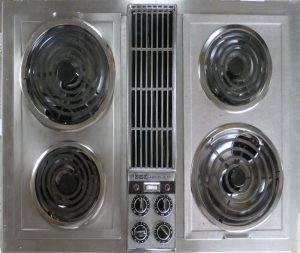
I removed the control panel and sliced the stainless steel trim on either side of the center section to create two separate sets of dual burners (one for my smoker and one for spare parts).
I needed a place to put the electric burners. I wanted an enclosed box with a door that sealed reasonably well. I also wanted something that would be fireproof, if possible.
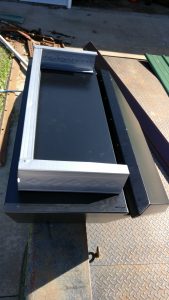
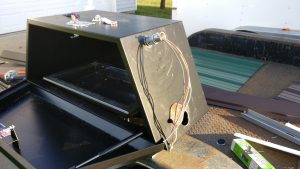
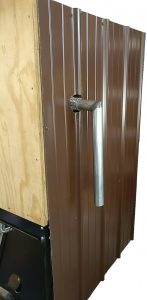
I found this trailer tongue box at HF.
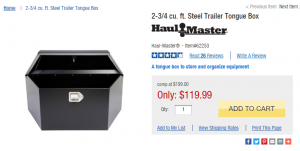
It was just big enough to fit the burner assembly and the door seal works well enough.
I did need to reverse the tongue on the lock set to eliminate the need for a key to open the box.

I also took off the shock / lid-lifter. I didn’t need it and it had plastic ends that didn’t seem compatible with a smoke box.

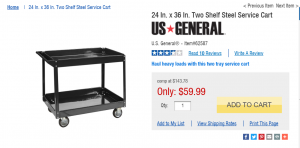
I needed to build a rolling base for the smoker but I took the easy way out and bought this cart from HF.
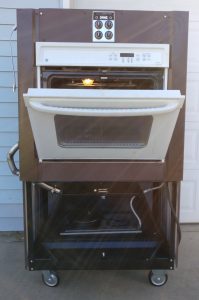
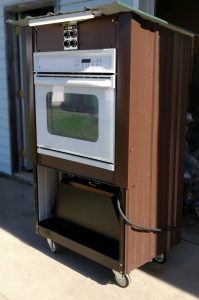
Here is a picture of the oven on the cart. (Note: I flipped the top tray upside down and left the handle in the scrap pile).
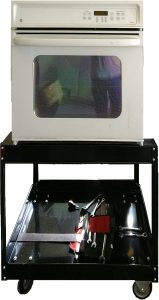
The trailer box worked great when I flipped it so the handle was on the top. The front door dropped down for easy access to the burner assembly.
I used 3.5″ metal studs to raise the tongue box over the lip of the cart.
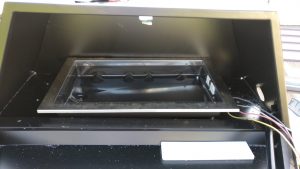
I drilled access and vent holes into the trailer box to fit the burner assembly.
I robbed a damper cap off an old BBQ grill and used it on the intake side of the smoke box.

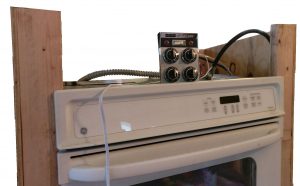
I added 2x4s and 1/2″ plywood panels to the sides of the oven to make it fit the 36″ cart and to provide frame for the oven to screw to. I also decided to make a panel above the oven for the Jenn-Air controls. all the wiring would be enclosed above the oven.

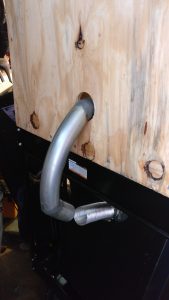
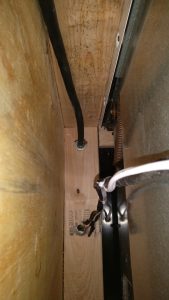
Detail of the Smoke Input. 1.75″ carburetor pre-heater hose is used as a flex connector from the smoke box to the oven. I will weld up a better connector in the future but I still want some flex between the two boxes.
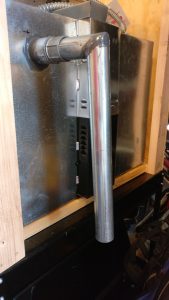
Detail of the Exhaust (smokestack). The stack flows downward to the level of the bottom of the oven for heat retention.
Detail of the wiring entering the cabinet. I used a hose clamp and a washer as a strain relief on the #12 3-wire power cord. The other two inputs are from the Smoke box burners and the LED strip light I installed under the top cabinet. I re-purposed the Jenn-Air fan switch to switch the LED strips on and off.
Here is a picture of one of the LED strips. It is under the cabinet and provides light for the smoke box.

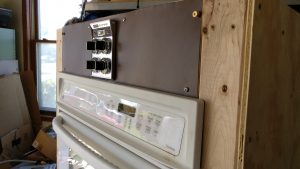
I added an access panel to get to the wiring without disassembling the cabinet. The brown metal behind the controls is aluminum and comes in 10″ x 10ft rolls and is white on one side and brown on the other. I think I paid about 12 bucks at Lowes for the roll.
I skinned the entire cabinet in metal roofing / siding.
Here is the inverse smokestack over the skin
Here it is with everything but the roof on.
Added the roof and the upper LED strip light.
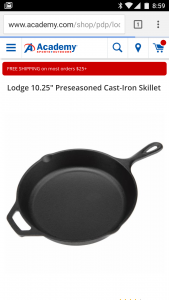
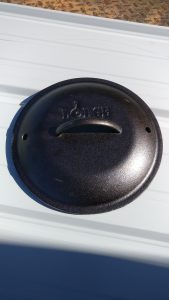
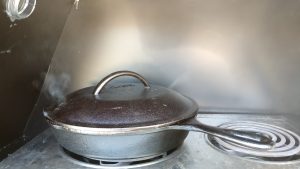
For the Smoke Generator I bought a cast iron skillet and a lid from Academy Sports
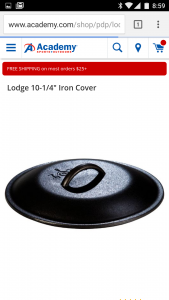
I drilled two 1/2″ holes in the cover.
I set the burner on about 30% and a few 1″ thick mulberry wood blocks last over 2 hours and come out completely black with no white ash.

Here it is generating smoke.
Here is a better view of the Smoke Box. I found a small stainless steel dog dish that did an excellent job as a moisture generator. I run that burner on simmer and it generates enough moisture so a few drops of water condense and drip out of the smokestack.
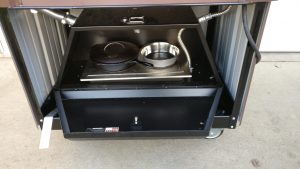
It looks a little like Frankenstein’s Monster but I am very happy with the results.

Great website. Good friends with your brother. Big fan of the Perkins crew. Thanks for sharing your recipes.
http://Www.bentzinger.com.